
")
OverviewFollowing first steps are shown here:
Generation of a MeetingAfter starting the software the screen like figure 1 is shown. On the left hand side the area for the meetings is shown and on the right side the workspace is located. In the meeting area, the meetings are stored and in the workspace the content like projects is associated. In order to setup a meeting click on the + symbol in the meeting area. After that click on 'Add Meeting'. After that you have generated an empty meeting. 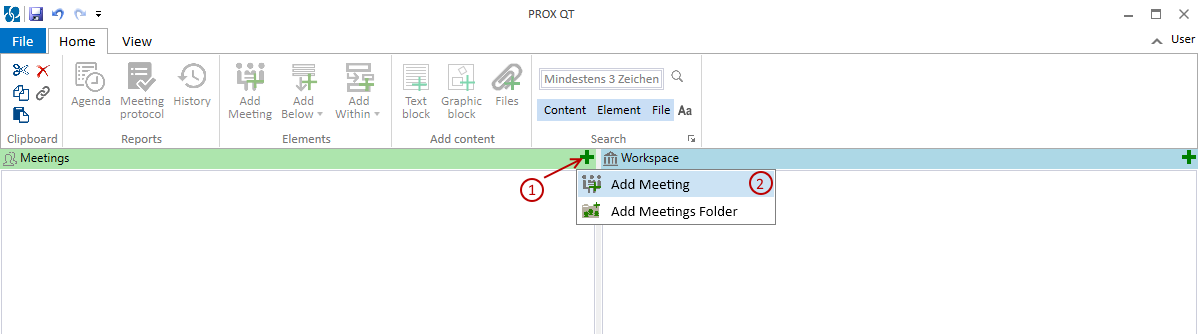
Enter meeting dataIn figure 2 the meeting element with expanded details is shown. With the icon (1) you can expand and collapse these details. If you move with the mouse over those details, you get a short description. By clicking two times the edit mode for the dedicated field is activated. The title of the meeting should be entered at position (2). You can have more space for editing, if you move the bar (3) to the right side.
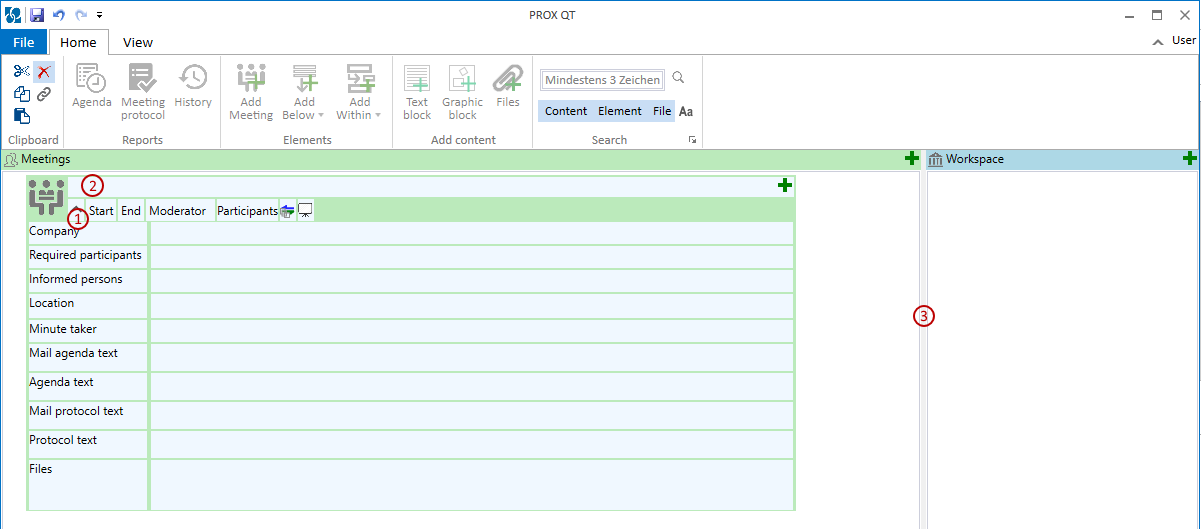
Add responsible persons and companiesBy clicking two times on the moderator field (figure 2), you get a search field (3). If you have entered already persons, you can search them by entering the first characters. You can create a new person (1) or get the persons from the address book (2). It is possible to add also persons which are not working for your company. This simplifies your work for the case of having meetings with customers or suppliers. You can do the same for assigning companies to the meeting.  Add agenda and task pointsIn figure 4 it is shown how elements like agenda points or tasks can be added to the meeting. By clicking on the + symbol (1) the possible element types are shown. For larger meetings you can use aganda points (2) in order to organize the meeting. For smaller meetings you can just use directly elements like tasks or decisions. 
There is no requirement to completely fill in all the available fields. You can just enter the already known information. Later, while processing the meeting, you can than discuss with the participants and fill in the new information directly. In figure 5 a prepared meeting is shown. The elements can be drag and droped in order to organize the meeting to your requirements. 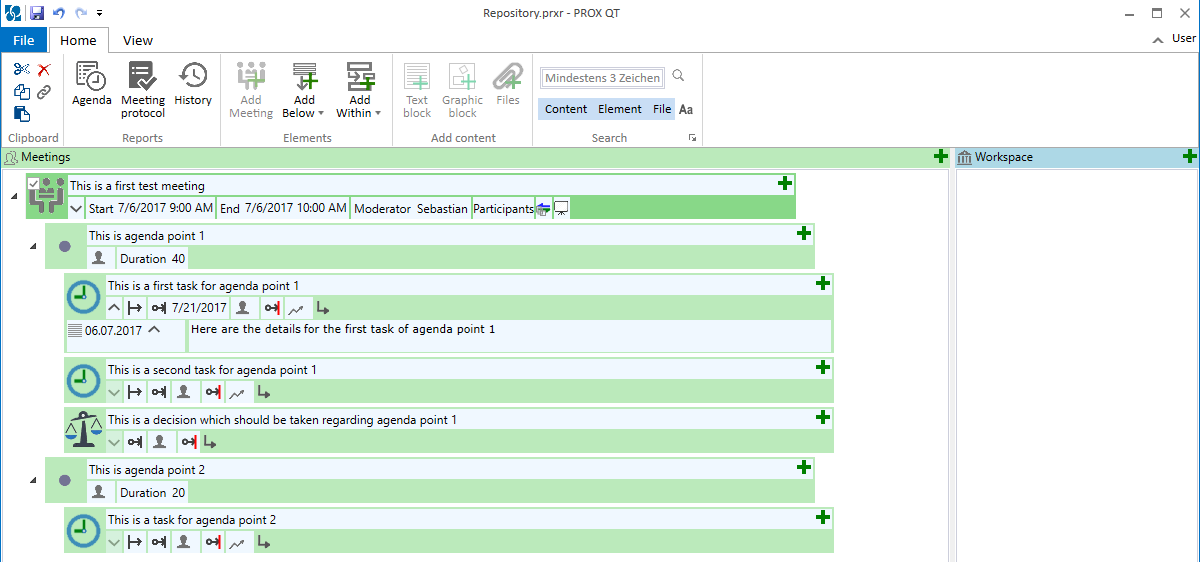
SavingYou have a lot of possible save options available (figure 6). What is saved here is a repository which can contain many meetings an projects. This has the advantage, for the case of overlapping areas, that they can handled together. For this example a file (2) would be the best way to proceed.

Generation of a AgendaFrom this prepared meeting a agenda can be automatically generated. For that, first select your meeting (figure 7 - 1) and than click on the agenda button (2). 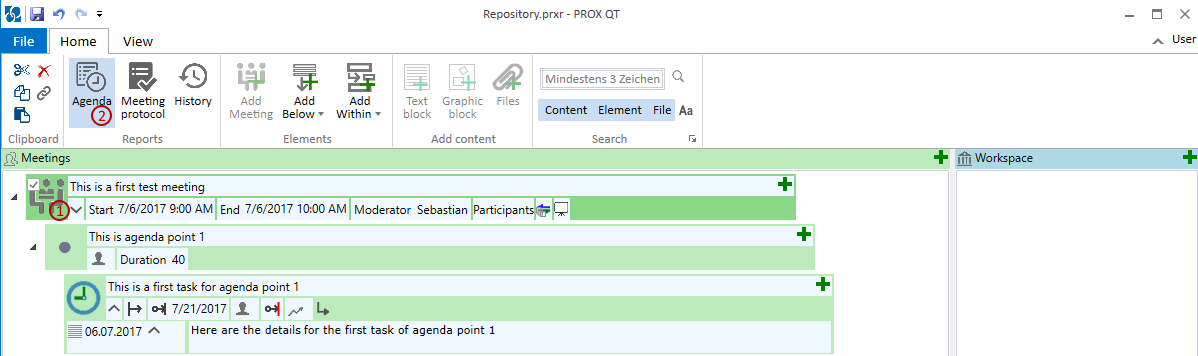
The aganda will be automatically shown as in figure 8 is shown. The agenda contains not only the main agenda points, but also all the detailed already known information regarding those points. This has the advantage, that all participants are able to prepare well for the meeting. Under the tab 'Generte' (1) the different save options of the agenda is shown. If you have MS Outlook installed, you can directly make a meeting request (2) or send an E-Mail (2) invitation. The fields for the meeting request or the E-Mail are prefilled, according to the requirements of the meeting and the agenda is added as pdf to this invatation. With the properties (4) you can select which information details should be included in the agenda. By clicking the recreated button (5), the agenda is created again according the changed settings. 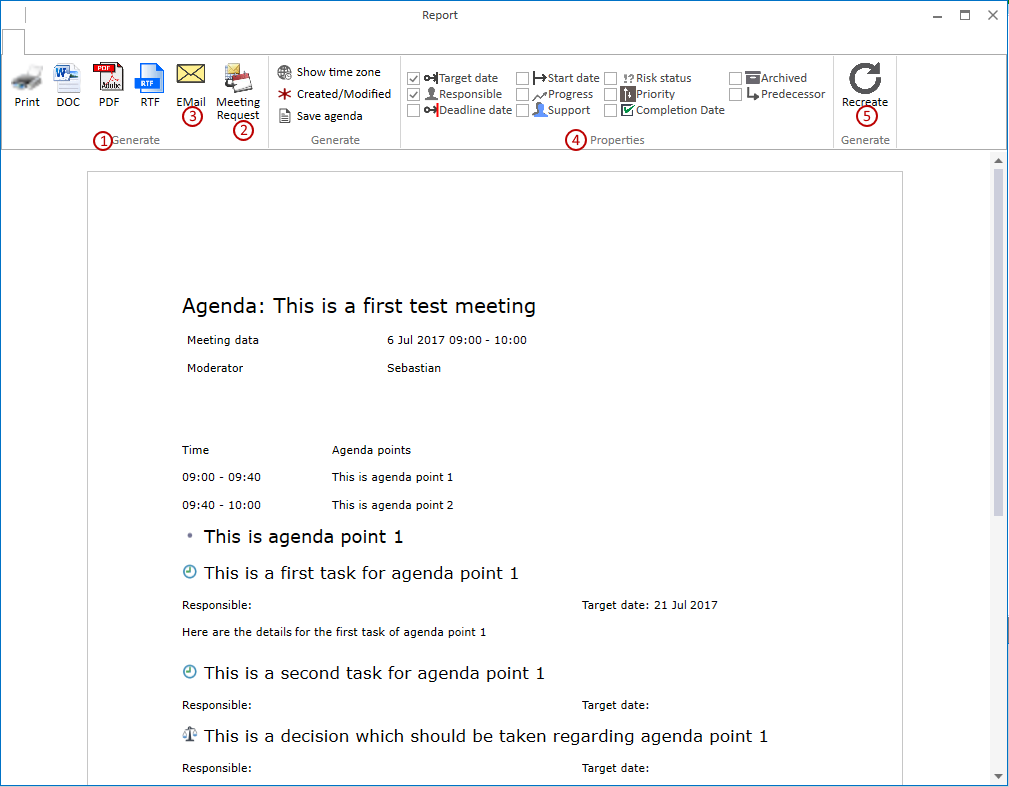
Perform a meetingThe meeting is done directly with the generated meeting. Klick on the icon (Figure 9 -1) in order to have a full screen view. If you are using beamer and you want to change the size according to that, you can use the zoom controller (2) for that. 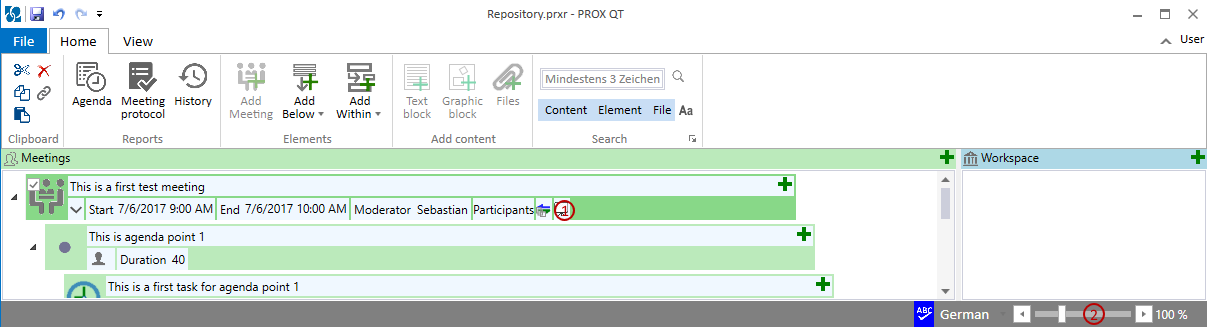
During the meeting you can alter the already defined elements, and you can add new elements too. It is also still possible to rearrange the elements during the meeting according your needs. Because the information is entered during the meeting it has the advantage that the participants can directly check these entries. In result you will get less misunderstandings and times of postprocessing Send the meeting protocolAfter the meeting it is possible to send out a protocol. Because all entries have been done during the meeting, it is possible to send it directly after the meeting. Sending out a meeting protcol is similar to an agenda. Instead of clicking on the 'Agenda' button, you click on the 'Meeting protocol' button (figure 7). With the opened dialogue, you are able now to save or send out the protocol. Set up a projectThe content you have generated can now be associated to one or more projects. In order to save this content independently from the meetings, there is the 'Workspace' area. You can create a new project by first bring the 'Workspace' again into view. This can be done by clicking as shown in figure 10 at view (1) and than 'Vertical split' (2). After that you click on the + symbol (3) and than 'Add Project' (4). You can also define sub-projects if you like. 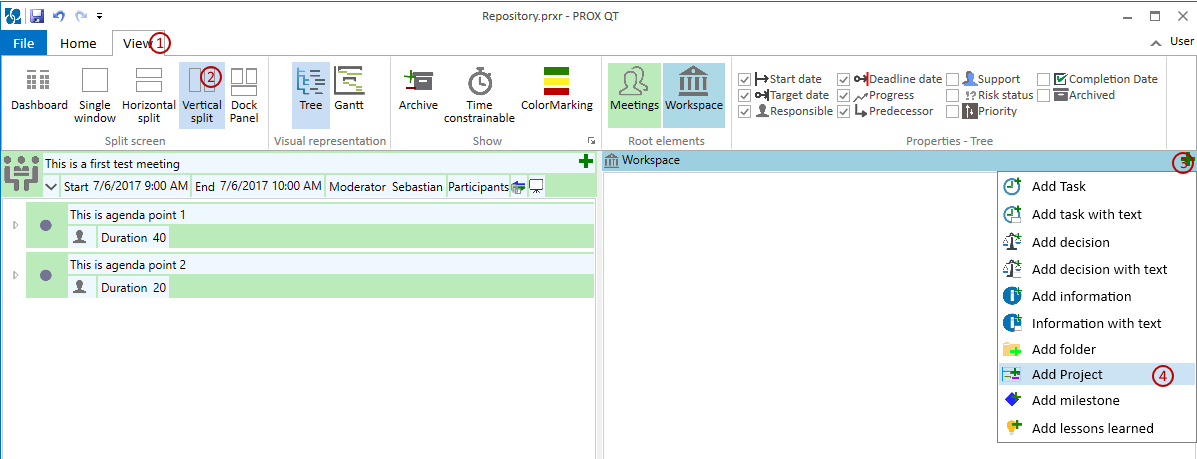
By using the drag&drop you kann now assign the meeting elements to the project (figure 11). By that an 'Indirect synchronizable link' is generated. The elements which are now linked in that way are marked with the 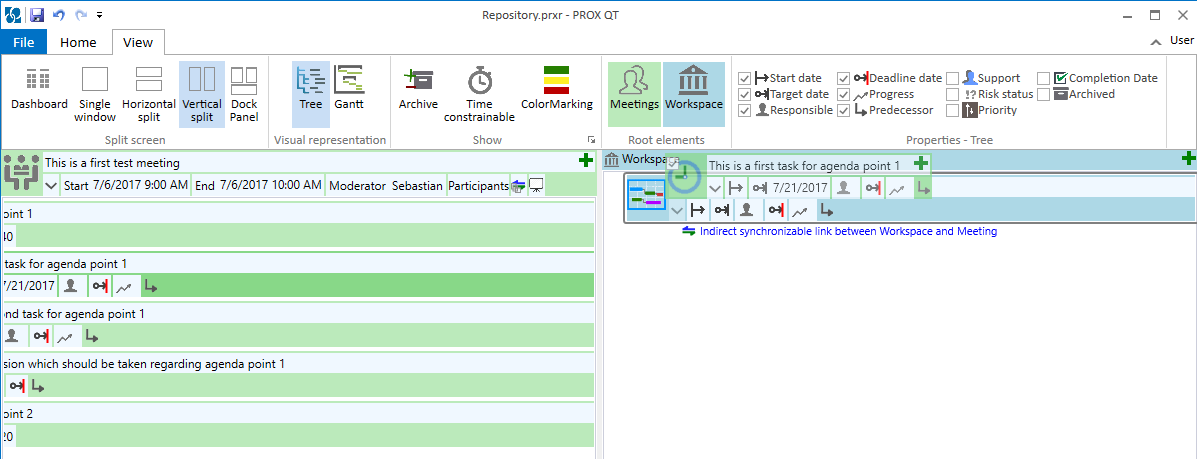
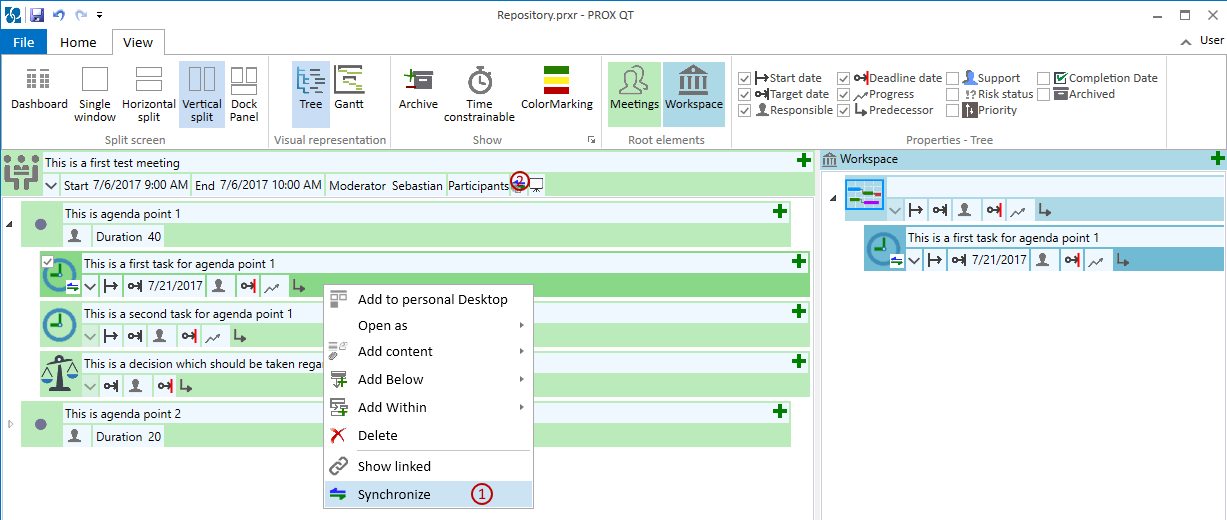
Synchronisation between meetings and projectsIf you now have generated such synchronizable links, than you can make changes in the meeting area and also in the workspace area. Both contents are for now separated. The reason for that is, that you can prepare for a new meeting with yet not finalized content without having that in the project. After perming the meeting, the content can then be synchronized to the project. The synchronization system automatically recognizes what information in the elements has changed. If on both sides the information has changed, a conflict resolving dialog helps you to solve this. In figure 12 it is shown how this synchronization can be done. You can either synchronize single elements (1) or the whole meeting (2).
Set up additional meetings based on the entered contentIf you plan to make a follow up meeting, than you can just use this meeting and rearrange and add elements according to your requirements. Or if you like, you can make a new meeting element and drop there your discussion points. After that you can again generate and send out the agenda. With this way of working, you have only one data basis for the meetings and for the projects. Known problems like not updated protocol lists are no issue any longer. All the information and agreed meeting content is with a high detail level directly accessible from the project tree. |
![]()